In this tutorial, we will look how to configure a mail server (iRedMail) on the EC2, assign an Elastic IP (static public IP), enable port access for SMTP / IMAP communications and more, to replicate an actual email flow from server to server.
Pre-Requisites Link to heading
- You have access to a linux environment where you want to configure iRedMail.
- Network connection on that linux environment.
- Privileges to run the commands as a super user.
- A TLD domain to setup mail server’s hostname and configure settings.
example.com with the domain that you have registered with your DNS provider. Use of example.com is for merely demo purposes to showcase how DNS mapping is working.Prepare the Linux Instance Link to heading
Login to the linux instance:
ssh -i ./<private-key.pem> <username>@<public-ip>
Update the system and install the required tools:
sudo apt update -y
sudo apt install -y wget tar bzip2 gzip
Set hostname to the mail server’s hostname. For example: If you have decided to use mail.example.com to use as your mail server hostname:
sudo hostnamectl set-hostname mail.example.com

# Verify
hostname
Also add the hostname to your /etc/hosts file to route internally made requests to the mail server also work with localhost.
sudo nano /etc/hosts
Make sure an entry like this is configured.
127.0.0.1 mail.example.com mail localhost
Download iRedMail Link to heading
Upgrade to root and change directory into /root
sudo su
cd /root
Download and extract the iRedMail from one of the tagged releases from github. Currently, at the time of writing this blog post the latest version is 1.7.4.
wget https://github.com/iredmail/iRedMail/archive/refs/tags/1.7.4.tar.gz

# Extract
tar xvf 1.7.4.tar.gz
Install iRedMail Link to heading
Run the installer script iRedMail.sh
cd iRedMail-1.7.4

# Give executive permissions iRedMail.
chmod +x ./iRedMail.sh

# Run the installer
./iRedMail.sh
Installer Options Link to heading
- Default Storage location
/var/vmailis fine - Web server:
nginx - DB:
PostgreSQL(PressSPACEto mark the selection) - Enter your domain:
example.com
Note that your server hostname should be
mail.example.com.
- Configure the Administrator account with a secure password.
- Enable the following selections:
Fail2ban,iRedAdmin,Roundcubemail- Optional: If you wanna play around with monitoring, enable
netdata
- Optional: If you wanna play around with monitoring, enable
Once the installation finishes, restart the server and then re-connect via ssh:
reboot
Verify running services Link to heading
Verify that the services are running fine.
systemctl status postfix
systemctl status dovecot
systemctl status nginx
systemctl status postgresql
Configure DNS Link to heading
For this part I will be using Namecheap to configure my DNS configuration as that’s where I have bought the domain from. Again, it’s on you to pick any domain registrar and all you need to do is set the records on their DNS hosted zone. For more information checkout their respective documentation.
A record Link to heading
mail.example.com -> Linux server's static IP (Elastic IP)
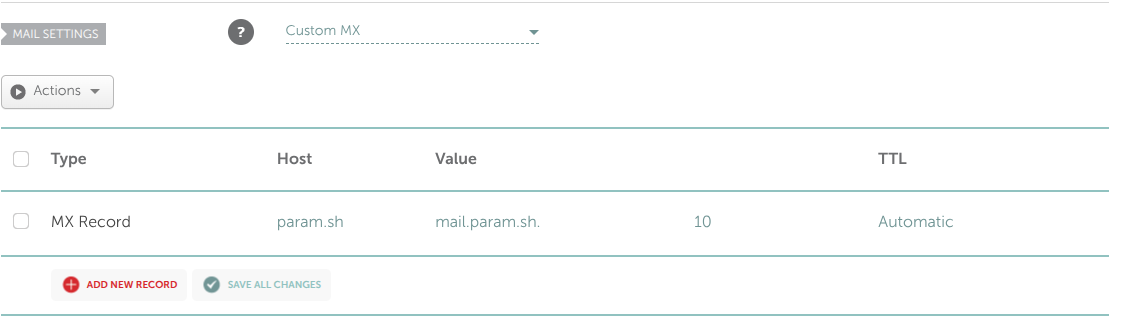
MX record Link to heading
example.com -> mail.example.com -> Priority: 10
SPF Record Link to heading
TXT -> v=spf1 mx -all
DKIM Record Link to heading
iRedMail generates DKIM keys. Retrieve them with:
sudo amavisd showkeys
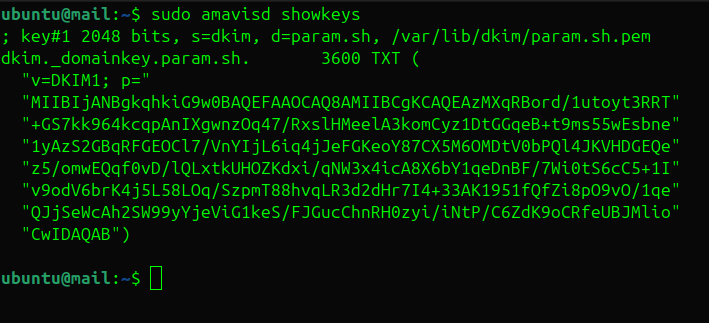
Add the DKIM TXT record to DNS:
TXT -> v=DKIM1; p=<public key>
DMARC Record Link to heading
_dmarc.example.com TXT v=DMARC1; p=quarantine; rua=mailto:postmaster@example.com
Once you set all the records they should look like this in your DNS table:


Verifying deployment Link to heading
Visit your iRedAdmin dashboard to see whether your DNS mappings are correct. It should be available at http://mail.example.com/iRedAdmin.
If site doesn’t open for you give upto 10-15 minutes for DNS servers to sync in.
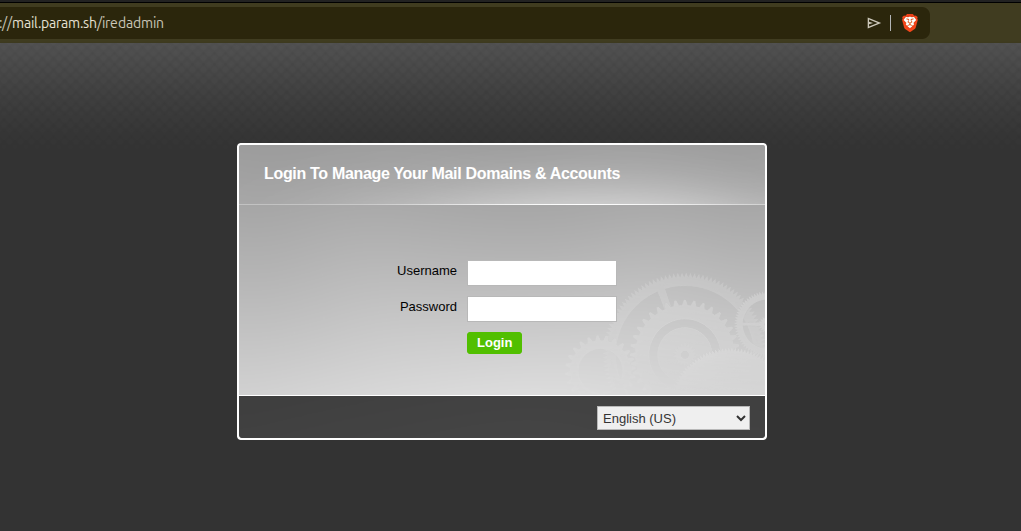
Sign in by logging with:
- Username:
postmaster@example.com - Password: The password you setup while installing iRedMail.
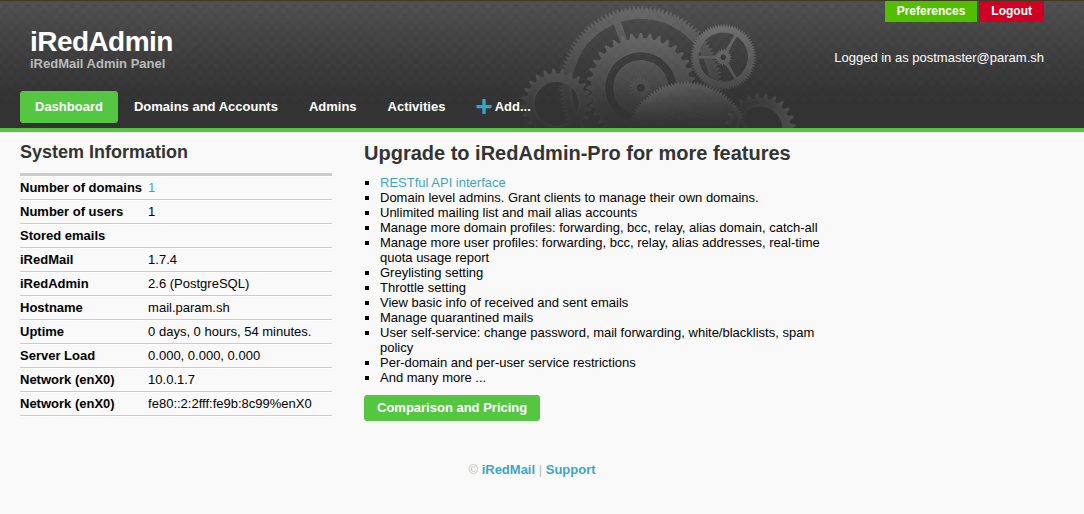
iRedAdmin Dashboard
From here, you can add more domains / user accounts etc.
Let’s try sending a mail from Gmail / iCloud to postmaster@example.com. Once you have sent mail from your another mail account, verify that you received the email by logging into the webmail available at http://mail.example.com/mail/.
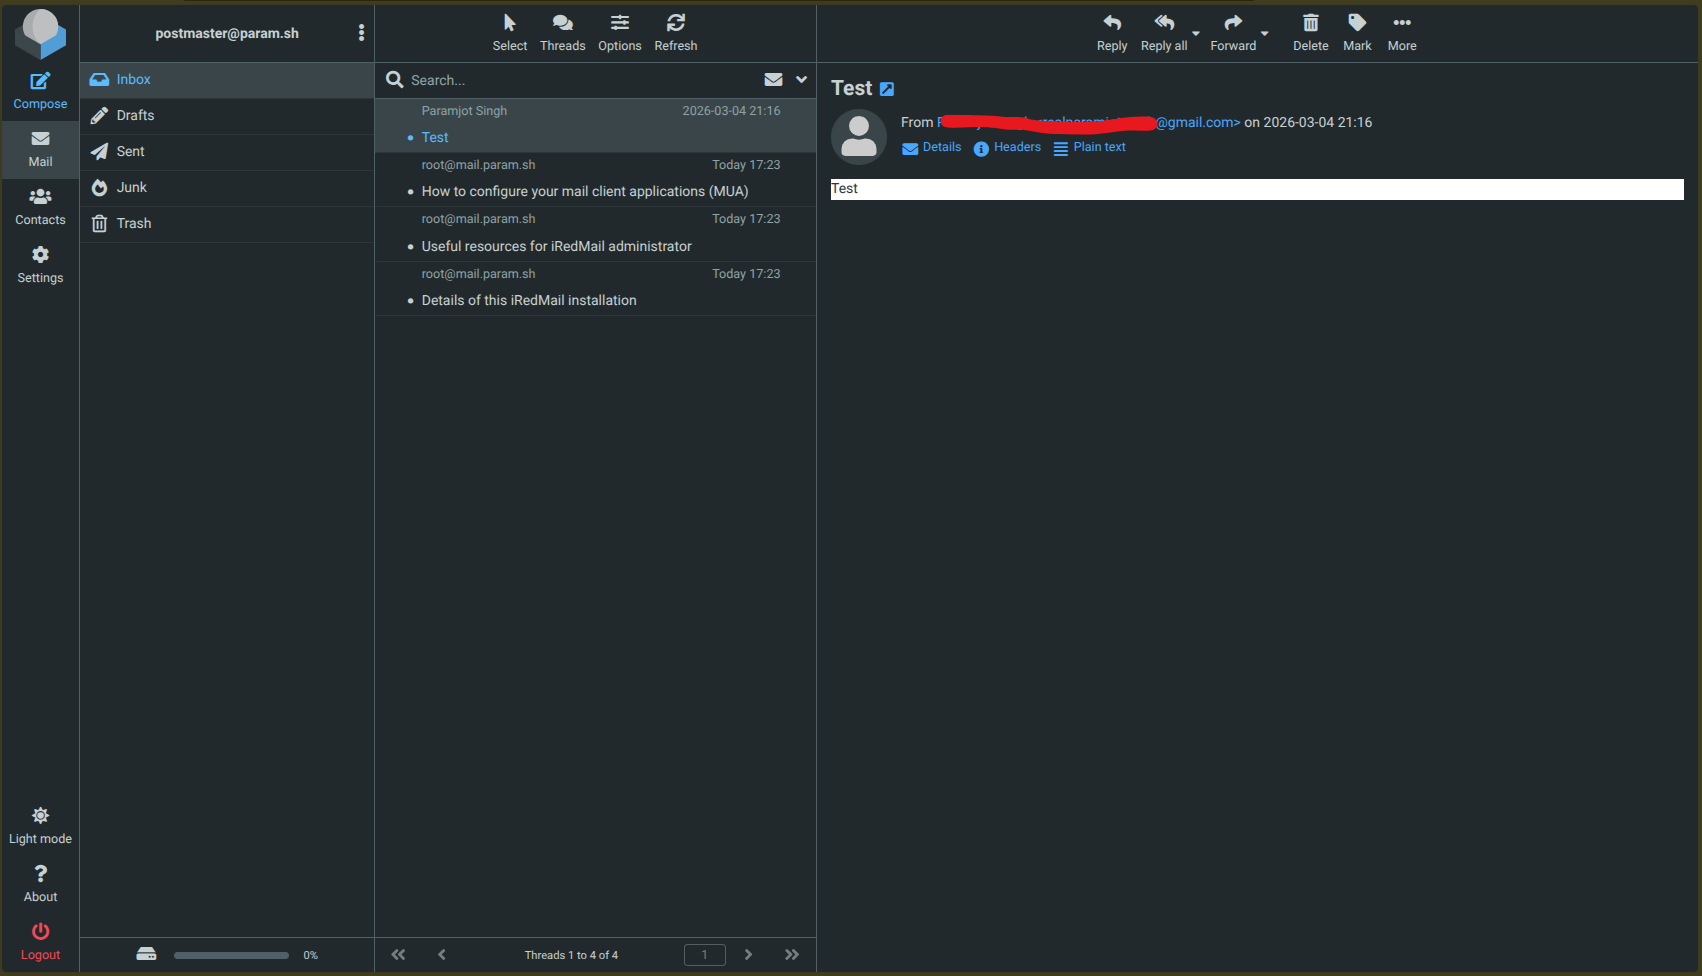
I tried a bunch of times troubleshooting and making changes here and there. In the end, everything worked after 1 hour with the same configuration I began with 😄
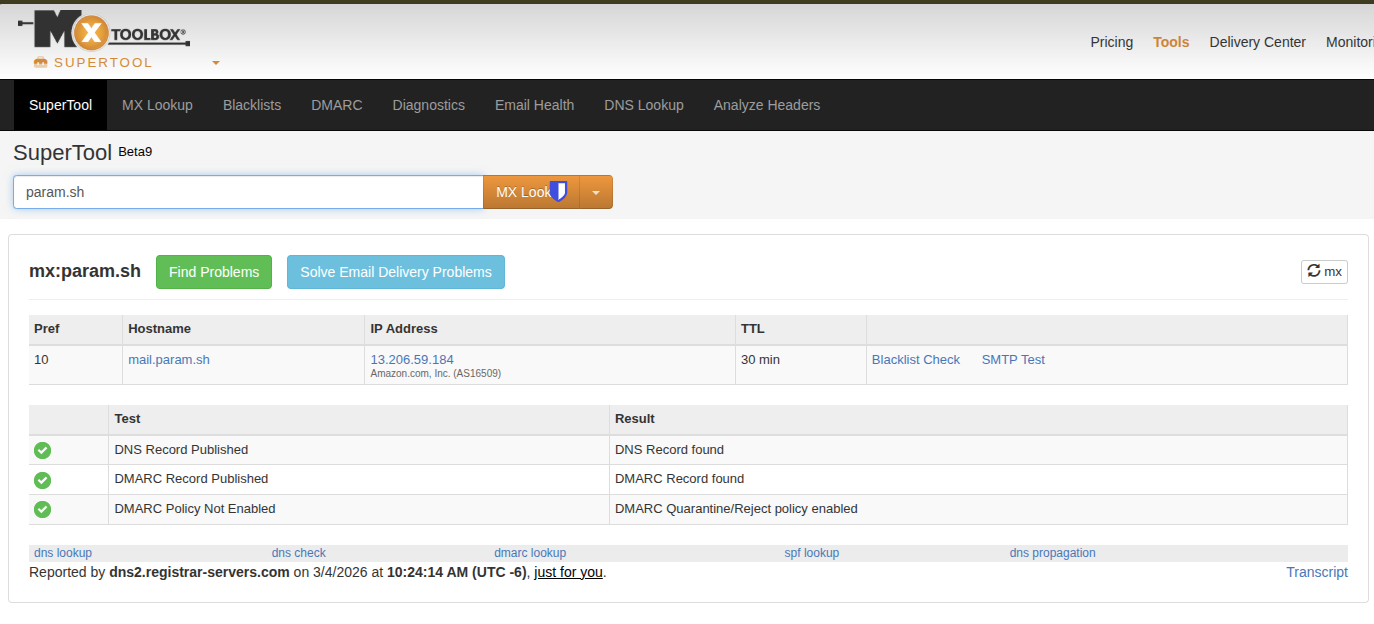
If you’re still facing any difficulty in identifying what could be the issue. You can checkout MxToolbox to help you troubleshoot things for free and identifying potential gaps / mistakes you must have done.
All set, but we still don’t have a TLS certificate in place to prevent any kind of MITM attack.
Enable TLS certificates Link to heading
We can configure our very own free TLS certificate using Let’s Encrypt. Start by installing Certbot:
sudo apt install certbot -y
Then you can request a new certificate using:
sudo certbot certonly --standalone -d mail.example.com
Certificates will be stored in:
/etc/letsencrypt/live/mail.example.com/
Configure Nginx with TLS Encryption Link to heading
As we are using nginx for hosting our iRedMail mail server, we have to make changes to nginx config to setup the SSL certificate.
To link the certificates in nginx configuration you will have to edit files in sites-enabled directory.
/etc/nginx/sites-enabled:

total 0
lrwxrwxrwx 1 root root 46 Mar  4 11:53 00-default-ssl.conf -> /etc/nginx/sites-available/00-default-ssl.conf
lrwxrwxrwx 1 root root 42 Mar  4 11:53 00-default.conf -> /etc/nginx/sites-available/00-default.conf
Note that 00-default-ssl.conf is only used when a user visits https://. Therefore, we will update 00-default.conf as well to redirect all the traffic from http to https
Add the following to 00-default-ssl.conf
server {
    listen 443 ssl;
    server_name mail.example.com;

    ssl_certificate /etc/letsencrypt/live/mail.example.com/fullchain.pem;
    ssl_certificate_key /etc/letsencrypt/live/mail.example.com/privkey.pem;

    ssl_protocols TLSv1.2 TLSv1.3;

    ssl_ciphers HIGH:!aNULL:!MD5;

    root /var/www/html;

    location / {
        index index.php index.html;
    }
}
Add the following to 00-default.conf
server {
    listen 80;
    server_name mail.example.com;

    return 301 https://$host$request_uri;
}
To test whether the configuration is correct or not, run the following command:
nginx -t
If there are any errors in the configuration, it will be shown in the output. If everything is fine, restart the nginx service using following command:
sudo systemctl restart nginx.service
Verify by visiting http://mail.example.com/iRedAdmin, it should auto redirect you to the https://mail.example.com/iRedAdmin.
Remarks Link to heading
Congratulations 🎉, you successfully configured and deployed your very own mail server, properly configured DNS records with correct security measures to verify authenticity of a mail server. This wasn’t an easy task, especially I myself took couple of days to put the pieces together while watching others on reddit struggling with configuration 😅.
Hope you found this post helpful if you like to read more such posts then checkout this complete series. If you like my work, consider following me on X. Ps: I am already shadow-banned and have lost a lot of reach 🥲.
Until we meet again.